Key Takeaways
- A complete grow tent setup requires six core components: tent, full-spectrum dimmable LED, inline exhaust fan, carbon filter, temp/humidity sensor, and growing medium
- Cannabis moves through five distinct phases — each with specific environmental targets for light schedules, temperature, and humidity that must be met consistently
- Most crop failures trace back to poor environmental control, missed feeding windows, or inconsistent light schedules — not genetics
- Commercial operations running multiple tents or strains need documented, repeatable schedules — intuition alone doesn't scale
Grow Tent Setup: What You Need Before You Start
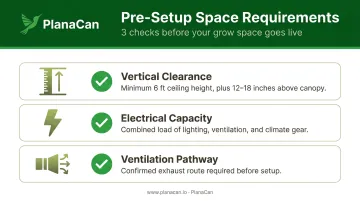
Before sourcing any equipment, confirm three things about your grow space:
- Vertical clearance — Most photoperiod strains need at least 6 feet of headroom; plan for an additional 12–18 inches above canopy for lighting and airflow
- Electrical capacity — Circuits must handle the combined load of lighting, ventilation, climate control, and supplemental equipment running simultaneously
- Ventilation pathway — You need a confirmed exhaust route: a duct port, exterior wall penetration, or dedicated HVAC return
Essential vs. Optional Equipment
Essential (non-negotiable):
- Grow tent with reflective interior lining
- Full-spectrum dimmable LED
- Inline exhaust fan (correctly sized — more on this below)
- Carbon filter
- Digital temperature and humidity sensor
- Growing medium (soil, coco, or hydro setup)
Optional (adds value at scale):
- Oscillating circulation fans
- CO2 supplementation
- Automated climate controllers
Ventilation is the highest-risk omission in any grow setup. Without adequate exhaust, heat accumulates, humidity spikes, and plants face heat stress and disease pressure before any other variable becomes a factor.
Tent Size and Plant Count Reference
| Footprint | Typical Use Case | Plants per Cycle |
|---|---|---|
| 4×4 | Single-strain R&D or mother room | 4–6 |
| 4×8 | Small veg or quarantine room | 8–12 |
| 10×10+ | Commercial single-room production | 20–40+ (density varies by training method) |
Footprint selection is a fixed constraint — changing it mid-cycle means restarting environmental dialing and canopy management from scratch. Size for your peak canopy coverage, not your current plant count.
How to Set Up Your Indoor Cannabis Grow Tent: Step-by-Step
Assembly order is not arbitrary. Each step depends on the previous one — skipping ahead creates problems that are annoying to fix and sometimes impossible to fix without partially dismantling the tent.
Assemble the Frame and Canvas
Connect poles to corner and center connectors, build the rectangular frame, then slide the canvas over and zip it closed. After assembly, inspect every zipper seam and duct port sleeve in a dark room. Even a small light leak during the dark period can trigger stress responses in photoperiod plants — this check takes five minutes and can save an entire harvest.
Hang Your Light and Ventilation Equipment
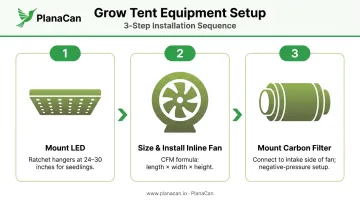
Follow this sequence for light and ventilation:
- Mount the LED on ratchet hangers at the manufacturer's recommended seedling height — typically 24–30 inches for high-powered panels. You'll lower it as plants mature.
- Size your fan correctly. AC Infinity's CFM guide provides the baseline formula: multiply tent length × width × height in feet for minimum CFM (one full air exchange per minute), then adjust upward for ducting resistance and carbon filter restriction.
- Mount the carbon filter inside the tent on the intake side of the fan. Run ducting from the filter through the fan and out a top duct port. This negative-pressure setup ensures all air exits through the filter — odor can't escape because air is always being pulled inward, not pushed outward.
Configure Climate Monitoring and Run a Validation Period
Mount your temp/humidity sensor at canopy height, away from direct airflow and away from the LED. A sensor placed near the fan reads artificially low; one near the light reads artificially high. Neither tells you what the plant is actually experiencing.
Run the tent empty for 24–48 hours at your target climate settings before introducing any plants. This test exposes heat buildup from undersized fans, humidity creep overnight, and any unresolved light leaks. Problems caught here cost nothing to fix — problems discovered in week 10 of flower can cost an entire harvest.
Indoor Cannabis Grow Schedule: Stage-by-Stage Breakdown
Consistent, documented scheduling separates repeatable results from one-off harvests. Every phase has recurring tasks — watering frequency, feeding cadence, training days, environmental adjustments — and missing even a few of those compounds into reduced yield by harvest.
Germination and Seedling Stage (Weeks 1–3)
Environmental targets:
- Light schedule: 18 hours on / 6 hours off (verified by Leafly)
- LED intensity: dimmed to 30–40%, positioned 18–30 inches from seedlings
- Humidity: 65–75% RH
- Temperature: 75–85°F
Seedlings are the most fragile phase. The most common mistake is overwatering — roots need oxygen as much as water. Only water when the top inch of growing medium is dry. Saturated pore spaces deprive the root zone of oxygen and invite disease pressure before the plant even has a chance to establish.
Vegetative Stage (Weeks 4–8)
Environmental targets:
- Light schedule: 18 hours on / 6 hours off
- LED intensity: progressively increased as the canopy develops
- Humidity: 40–60% RH (per Leafly's indoor growing guide)
- Temperature: 70–85°F
This is when plant training happens. Common techniques performed during veg include:
- Topping — cuts the main stem tip to force two main colas
- FIMing — removes ~75% of the newest growth to produce multiple shoots
- Low-stress training (LST) — bends and ties branches to flatten the canopy for even light distribution
All three build multiple bud sites before flowering begins.
Photoperiod growers can extend veg indefinitely to build canopy size before flipping. Autoflowers are different — they transition on their own internal timeline regardless of light hours.
Flowering Stage (Weeks 9–16)
Switch photoperiod plants to 12 hours on / 12 hours off to trigger flowering. Autoflowers stay on their existing schedule and flower without intervention.
Flowering environment:
- Humidity: 40–50% RH
- Temperature: 65–80°F
- Light discipline: zero light leaks during the dark period — any intrusion can cause stress or revert plants to veg
Late flower (final 1–2 weeks): Drop humidity toward 40% or below to reduce botrytis risk in dense bud sites. Begin flushing nutrients with pH-balanced water if it's part of your protocol — note that research summarized by Cannabis Business Times found no consistent chemical or yield effect for flushes of two weeks or less, so calibrate this decision against your goals.
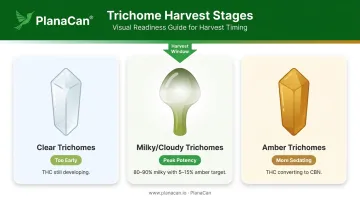
Harvest readiness: Monitor trichomes with a loupe or digital microscope. Per Ed Rosenthal's guidance, most experienced growers target:
- 80–90% milky/cloudy trichomes with 5–15% amber for peak potency
- Clear trichomes signal THC is still developing — harvest is too early
- Amber trichomes indicate THC converting to CBN, producing a more sedating effect
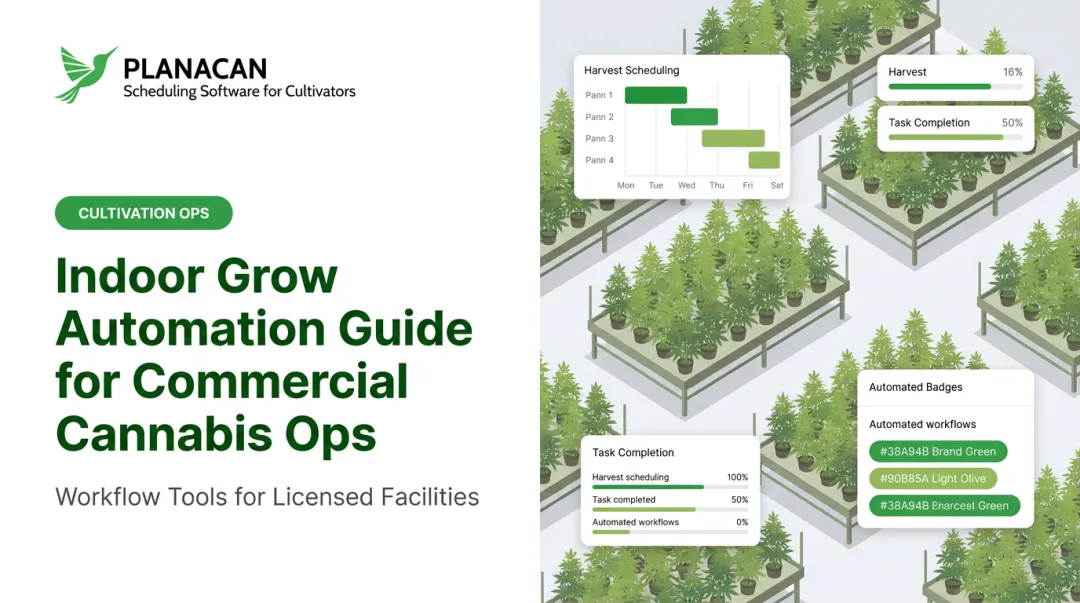
For commercial operations: Managing multiple tents with different strains or staggered flip dates creates real scheduling complexity. PlanaCan lets grow teams build custom workflow templates per strain, view all active harvest cycles on an interactive Gantt chart, and push automatic daily notifications to team members via push or email — reducing the missed treatments and inconsistent task execution that steadily cut into yields across multi-room facilities.
Grow Tent Climate Control: Temperature, Humidity, and VPD
Individual temperature and humidity readings only tell part of the story. Vapor pressure deficit (VPD) — the difference between how much moisture the air could hold at saturation and how much it actually holds — determines how hard plants are working to transpire. Per AROYA's VPD framework, you can have "acceptable" temperature and humidity readings and still be outside optimal VPD, stressing plants without an obvious cause.
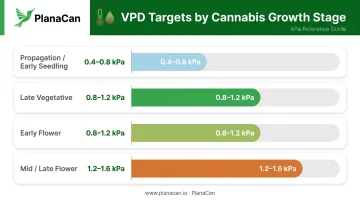
Stage-by-stage VPD targets (AROYA; Koolfog):
| Growth Stage | VPD Target (kPa) |
|---|---|
| Propagation / Early Seedling | 0.4–0.8 |
| Late Vegetative | 0.8–1.2 |
| Early Flower | 0.8–1.2 |
| Mid / Late Flower | 1.2–1.6 |
Managing Humidity Across Phases
- Raise humidity (seedlings): Run a humidifier, reduce inline fan speed slightly, or place a small tray of water in the tent
- Lower humidity (flower): Run a dehumidifier, increase inline fan speed, and add an oscillating fan to break stagnant air pockets around dense colas
- Late flower priority: Botrytis (bud rot) develops inside dense buds when humidity stays above 50% in weeks 13–16; keeping RH at 40–50% during this window directly cuts the conditions that allow bud rot to take hold
CO2 Supplementation
Ambient CO2 at roughly 400 ppm combined with consistent air exchange is sufficient for most tent grows. Per Fluence's CO2 resource, CO2 supplementation becomes relevant at PPFD levels of 800–850 μmol/m²/s and above. Below that threshold, supplemental CO2 raises operating costs without improving yield — the plants simply can't use it.
Common Grow Tent Problems and How to Fix Them
Light Burn and Heat Stress
Symptoms: Upper canopy leaves show yellowing, bleaching, or downward cupping — most visible on nodes closest to the LED.
Cause: LED mounted too close during peak flower, or inadequate exhaust allowing tent temps to climb above 85°F.
Fix:
- Raise LED to manufacturer-recommended height using ratchet hangers
- Verify fan CFM matches tent volume
- Check carbon filter for clogging — a clogged filter reduces airflow and causes heat buildup
High Humidity and Mold
Symptoms: White powdery coating on fan leaves (powdery mildew) or brown rot inside dense buds (botrytis).
Cause: Humidity exceeding 50% during flower, combined with poor air circulation between colas.
Fix:
- Run a dehumidifier or increase inline fan speed
- Add an oscillating fan inside the tent to break stagnant air around dense bud sites
- Perform selective defoliation to open the canopy and improve airflow
Nutrient Burn and Lockout
Symptoms: Brown, crispy leaf tips progressing inward (burn), or pale yellowing despite regular feeding (lockout).
Cause: Feeding at full label strength during early veg or seedling stages causes burn. Incorrect pH prevents nutrient uptake even when nutrients are present.
pH reference by medium:
- Soil: 6.0–7.0
- Hydroponic: 5.5–6.0 (per Leafly's hydroponics guide and Oklahoma State University Extension)
Fix:
- Start all nutrient programs at half strength and ramp up based on plant response
- Flush with pH-balanced water between nutrient phases to clear the root zone before switching formulas
Pro Tips for Running a Consistent Indoor Grow
Document every cycle from day one. Record watering and feeding dates, training events, light height adjustments, and environmental readings. Data from one harvest becomes the baseline for the next — patterns in that data reveal which variables most affect your specific strains and setup. For commercial teams, standardized documentation also prevents knowledge loss when staff changes.
Calibrate your environment before your plants arrive. Run the tent empty at target settings for 48 hours. Note temperature swings during lights-off periods, check for humidity creep overnight, and walk the tent perimeter in a dark room to spot light leaks. This catches problems that cost nothing to fix at setup and everything to fix at week 10 of flower.
Upgrade your tracking system before you expand your canopy. Spreadsheets break down fast when you're managing multiple tents, rooms, or strains simultaneously — there's no real-time sync, no mobile execution, and no automatic team notifications. Purpose-built tools close that gap.
PlanaCan is designed for commercial cultivations at 3,000+ sqft and gives grow teams:
- Custom workflow templates per strain or treatment protocol
- Automatic daily task notifications via app or email
- Completed vs. missed task tracking per team member across every harvest cycle
Garden First Cannabis documented a 36% increase in completed tasks and 23% decrease in labor costs after implementing the platform.
Frequently Asked Questions
How much yield can I expect from a grow tent?
A Washington State BOTEC analysis puts indoor production at roughly 40 grams per square foot per harvest. Training techniques like SCROG or LST can push that higher by improving canopy coverage and light penetration, with LED intensity playing a significant role in the final number.
What size grow tent is best for beginners?
A 3×3 or 4×4 tent is the most practical starting point. It's large enough to produce a meaningful harvest and learn climate management across all phases, but small enough that mistakes don't cascade across many plants simultaneously.
How long does a full indoor cannabis grow cycle take?
Leafly documents cannabis taking roughly 10–32 weeks from seed to harvest depending on strain and veg duration. Autoflowers typically complete in 75–90 days from germination. Add 2–7 days for drying and 2–4 weeks for curing after harvest.
What light schedule should I use for cannabis in a grow tent?
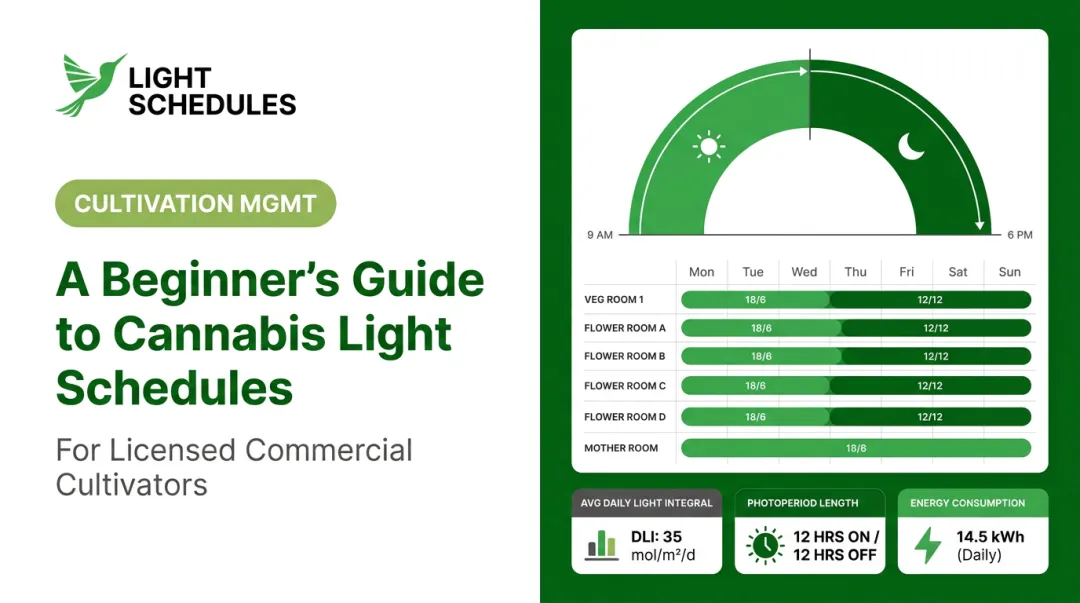
Use 18/6 (18 hours on, 6 hours off) for seedling and vegetative stages, then switch to 12/12 to trigger flowering in photoperiod strains. Autoflowers don't require a light schedule change. They flower on their own internal timeline regardless of hours provided.
How do I control temperature and humidity in my grow tent?
Size your inline fan for tent volume, use a humidifier during seedling/veg and a dehumidifier during flower, and place your sensor at canopy height. A sensor near the fan or light gives misleading data that makes dialing in VPD nearly impossible.
Do I need a carbon filter for an indoor cannabis grow tent?
Yes — a carbon filter is essential for odor control. Mount it on the intake side of the inline fan inside the tent. Per Gorilla Grow Tent and TerraBloom data, expect to replace it every 12–18 months as activated carbon loses effectiveness over time.